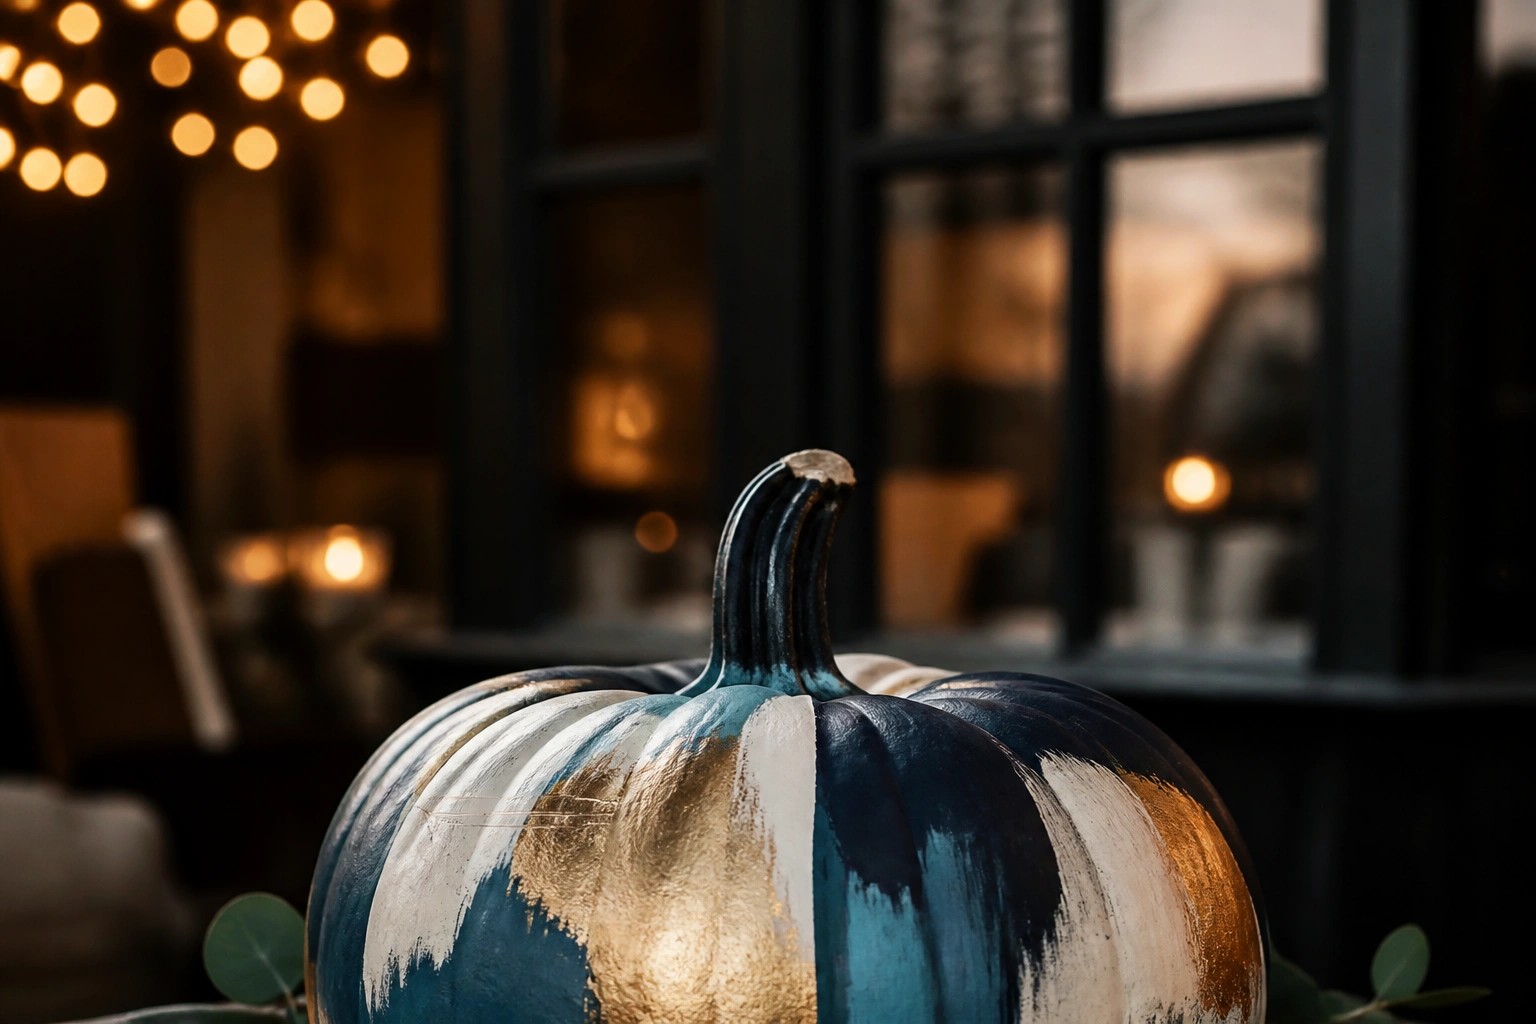
Painting pumpkins lets me bring bold color into my Halloween setup without filling every corner of the house.
I have noticed that vibrant designs tend to stand out best when placed on a mantel or central table where they become the natural focus.
This approach allows the rest of the room to stay comfortable and familiar while still giving the season its due.
Many people overlook how much impact a few carefully painted pumpkins can have when they use strong colors and simple shapes.
A single standout piece is often enough.
Paint A Pumpkin With Bold Swirls For The Table
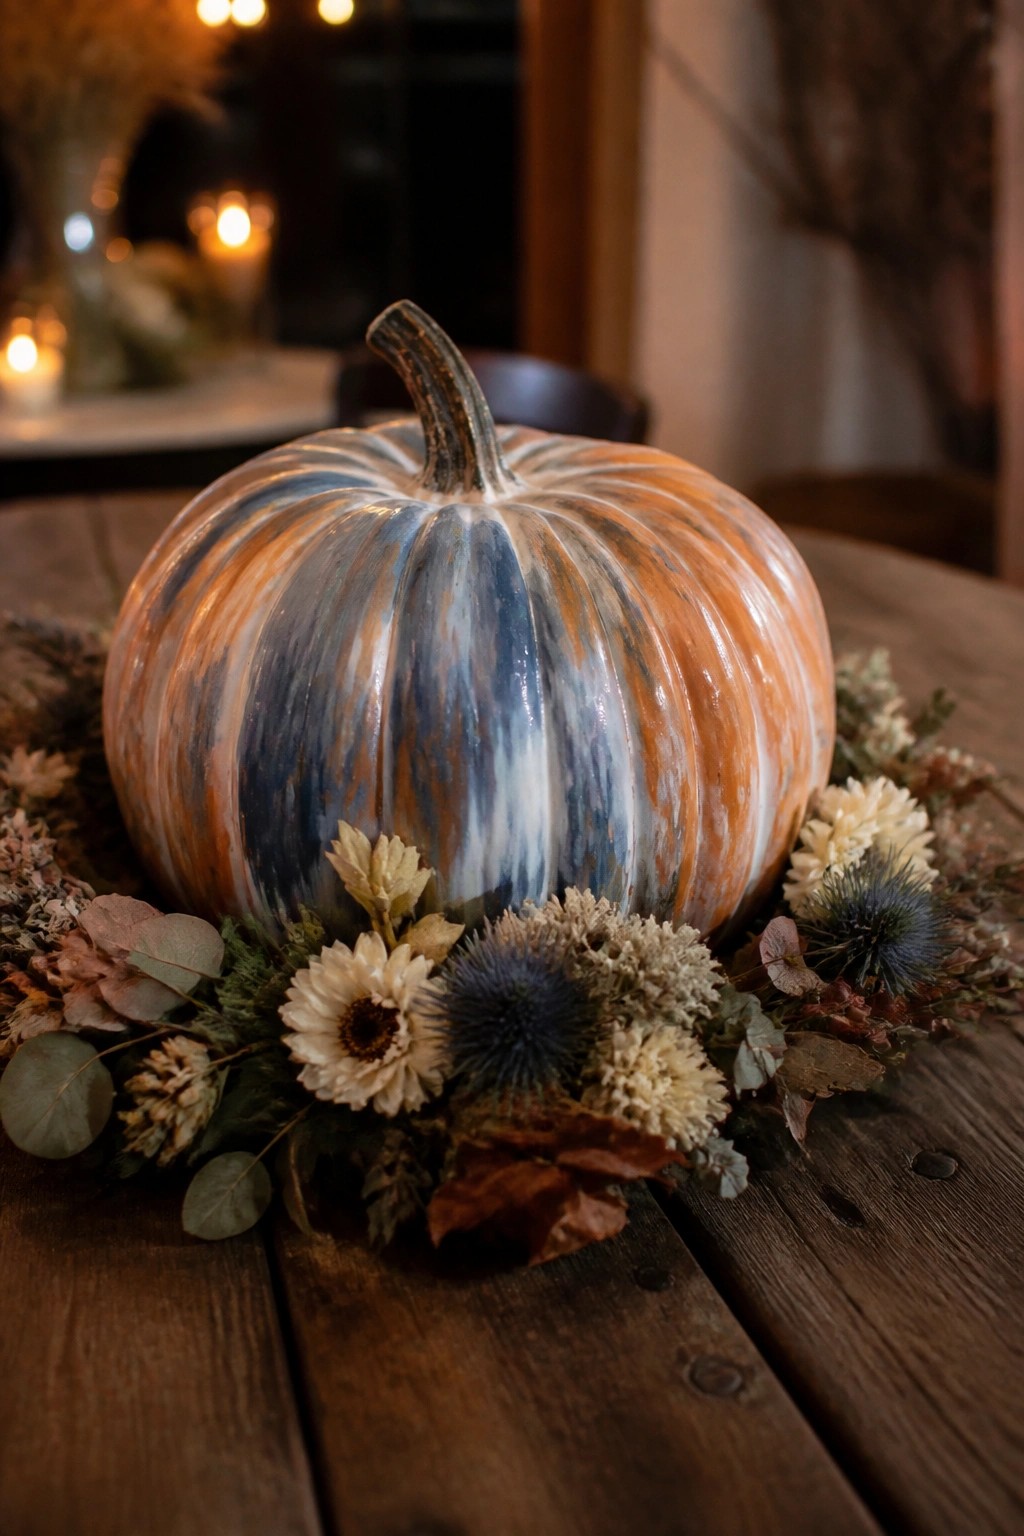
A painted pumpkin with streaked orange, blue, and white makes a strong focal point when placed right in the center of a table. The marbled finish stands out against the dark wood and gives the arrangement more impact than a plain pumpkin would.
Set one large painted pumpkin on a wooden surface and add a simple dried floral ring around the base. This works well for a dining table or sideboard and needs only the pumpkin and a few supporting stems to hold together.
Paint Soft Florals Across A Large Pumpkin
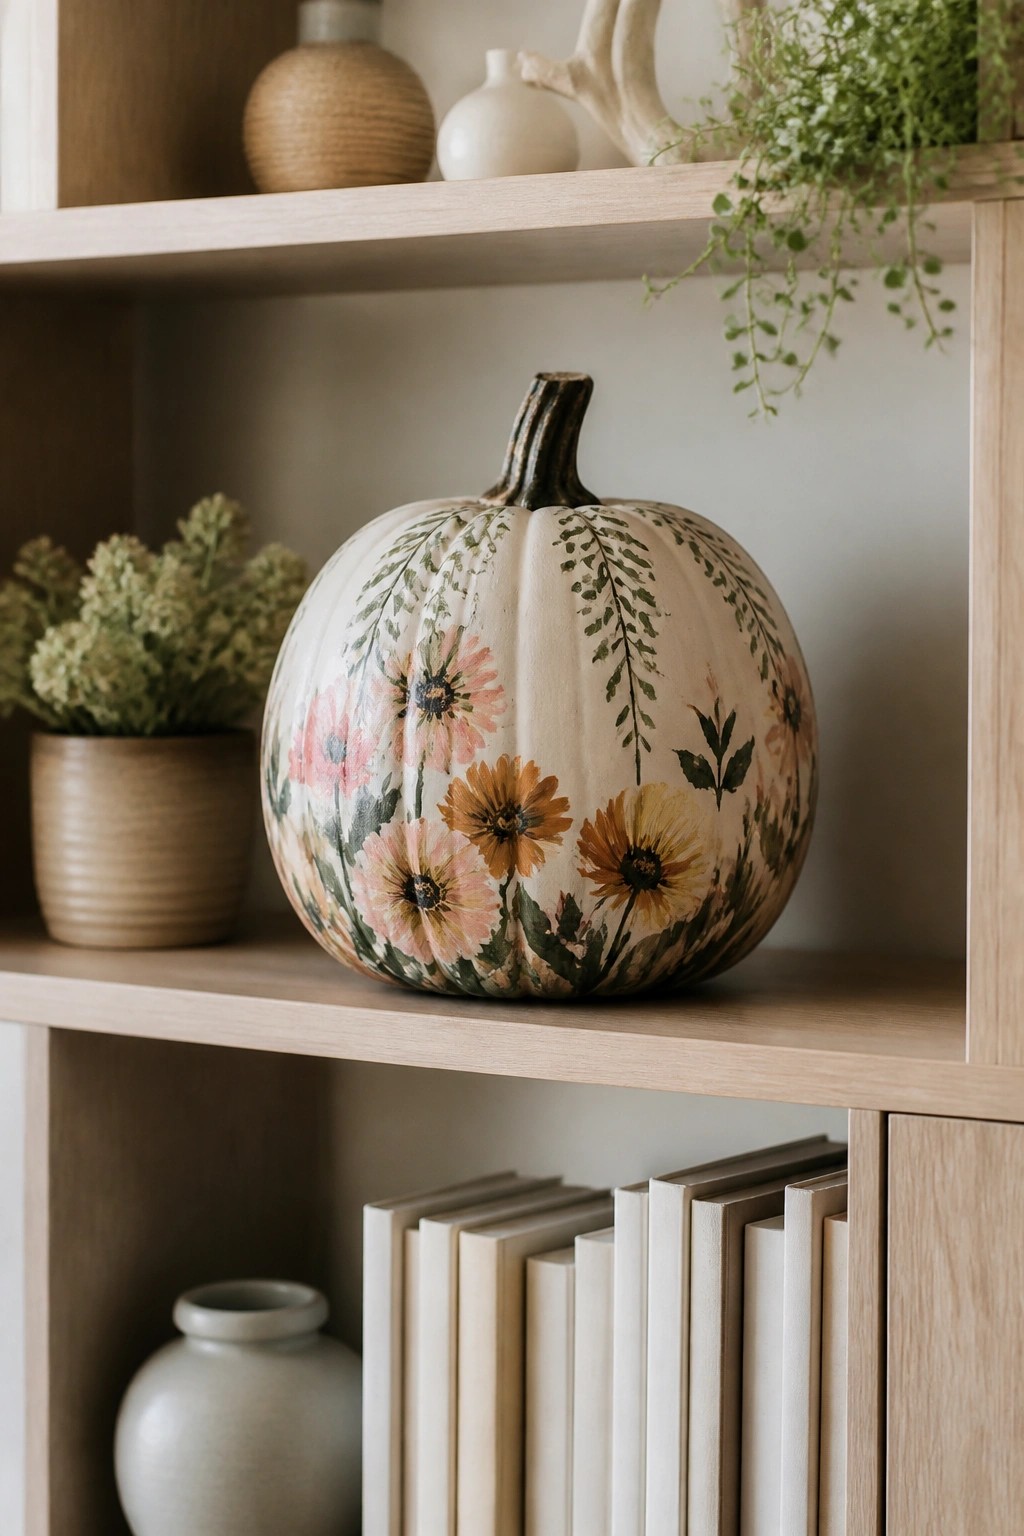
One simple way to give a painted pumpkin more impact is to cover it with loose flowers and leaves instead of a face. The mix of pink, orange, and yellow blooms against the light background keeps the look fresh while still reading as Halloween.
Set the finished pumpkin on a shelf or mantel where the pattern can be seen clearly. Use only a few supporting pieces nearby so the painted details stay the main attraction.
Group Painted Pumpkins On The Mantel
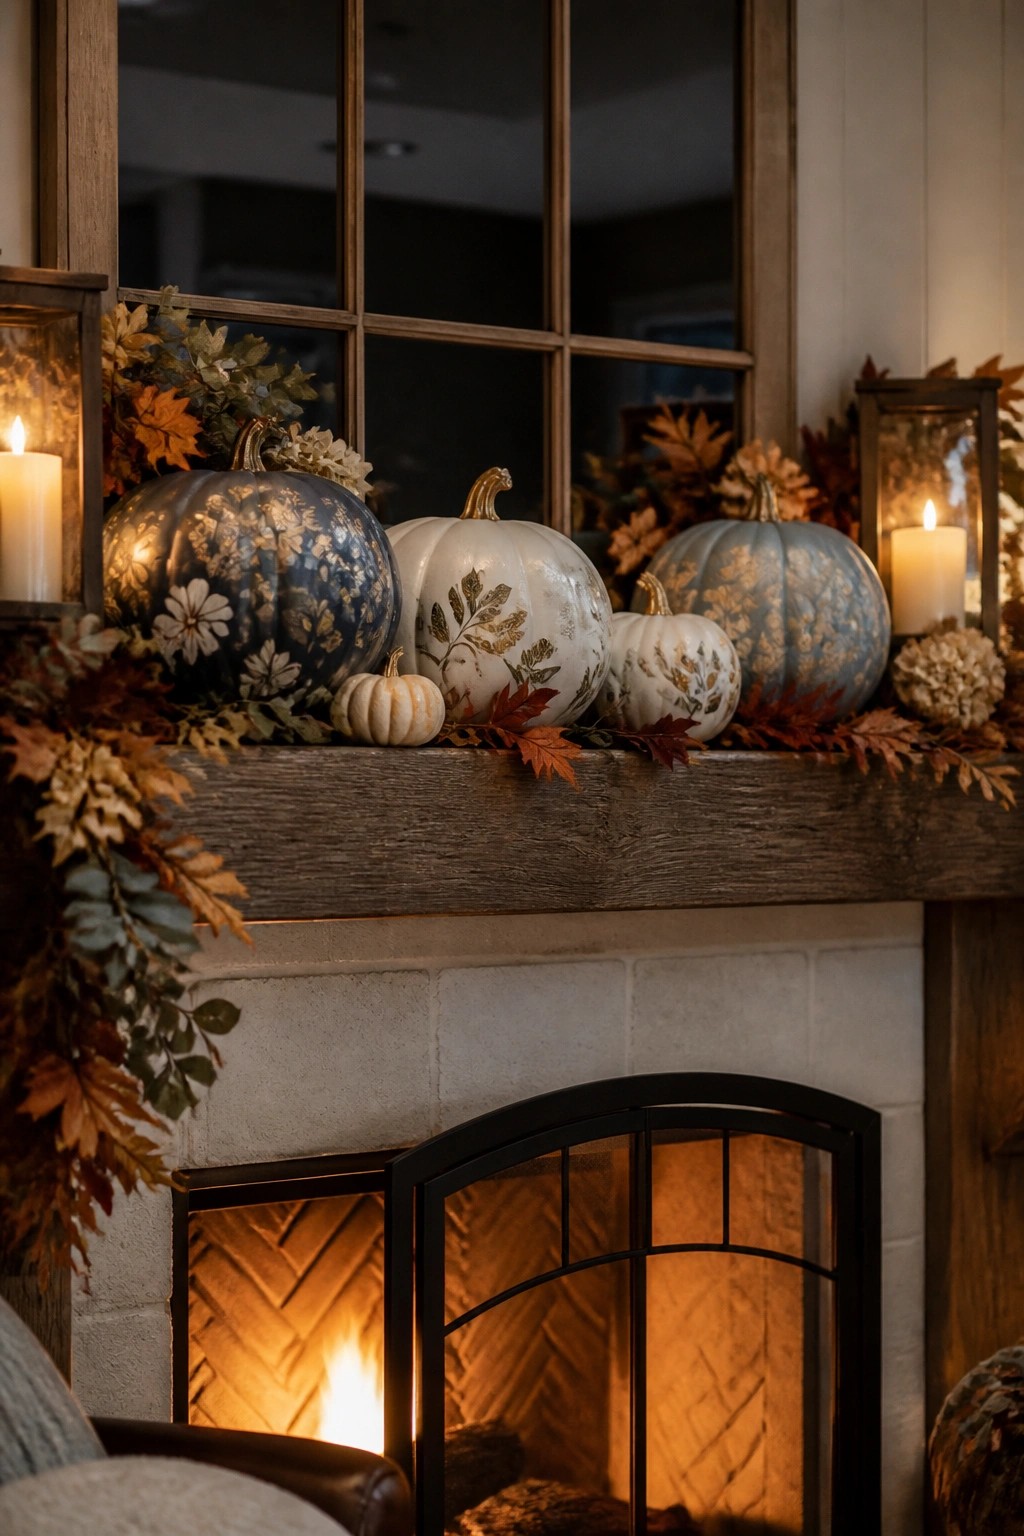
Painted pumpkins make a strong focal point when grouped across a mantel. The metallic designs stand out against the wood and give the display more personality than plain pumpkins.
Use three or four larger ones in the middle and tuck smaller ones between them. Add a couple of lanterns on the ends if you want light, but keep everything else minimal so the painted surfaces stay the main feature.
Paint A Pumpkin With Bold Brushstrokes For The Console
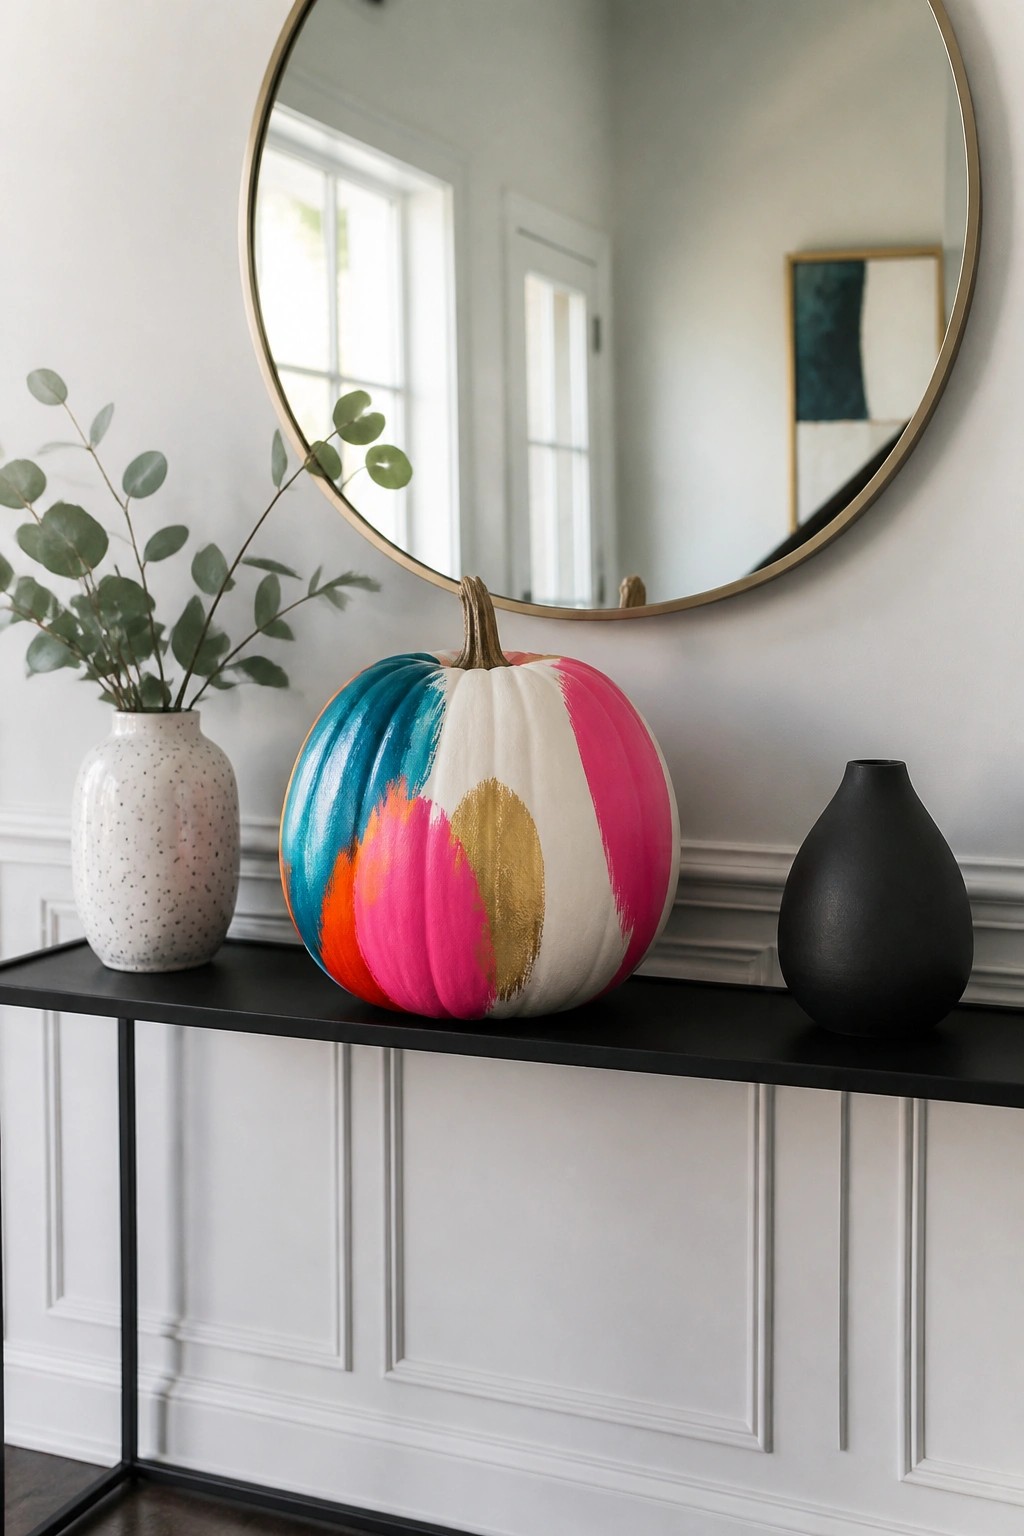
A single large pumpkin painted in bright teal, pink, orange, and gold stands out on a simple black console. The loose brushstrokes and metallic accent give it enough color to catch attention without needing extra pieces around it. This approach turns an ordinary pumpkin into the main focal point in an entry.
Place the painted pumpkin in the center of a console table where people walk by often. Keep the rest of the surface fairly clear so the colors stay the focus. One or two small neutral vases on either side are enough to frame it without competing.
Group Painted Pumpkins With Stripes And Dots
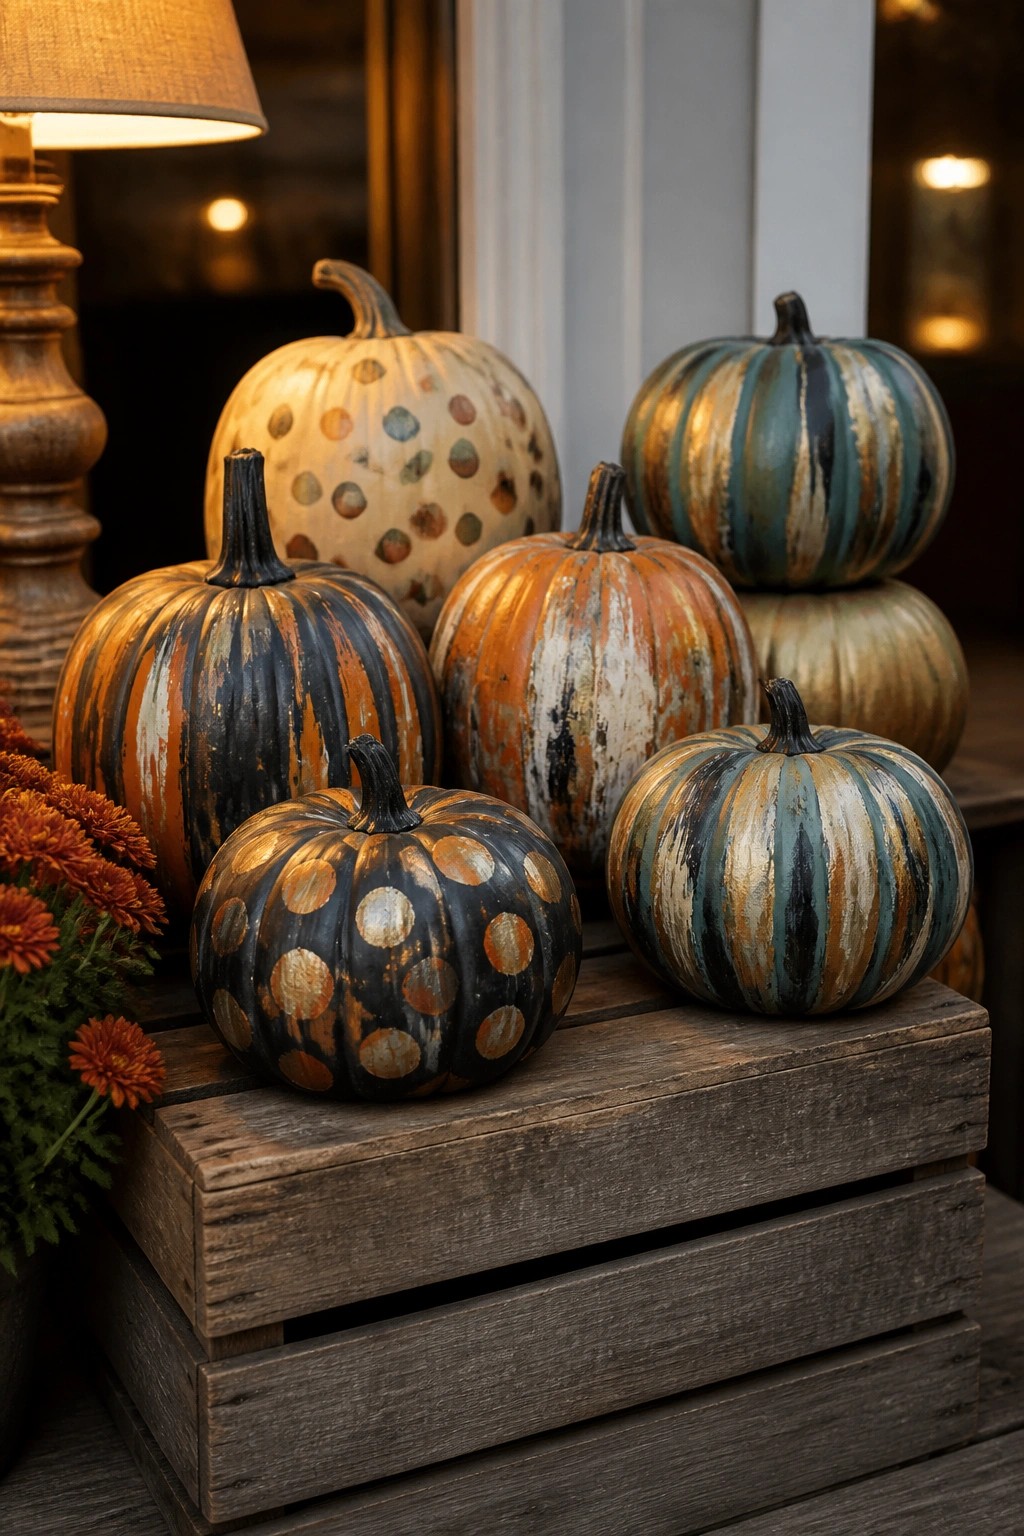
Painting pumpkins in bold stripes and large polka dots gives each one its own personality while keeping the whole group cohesive. The mix of black, teal, orange, and gold makes the display stand out without needing extra props or complicated setups.
This idea works best on a porch or near an entry where the crate can hold five or six pumpkins at different heights. Use leftover paint you already have, and leave a few plain spots so the patterns do not feel crowded.
Paint One Large Pumpkin In Bold Colors For The Centerpiece
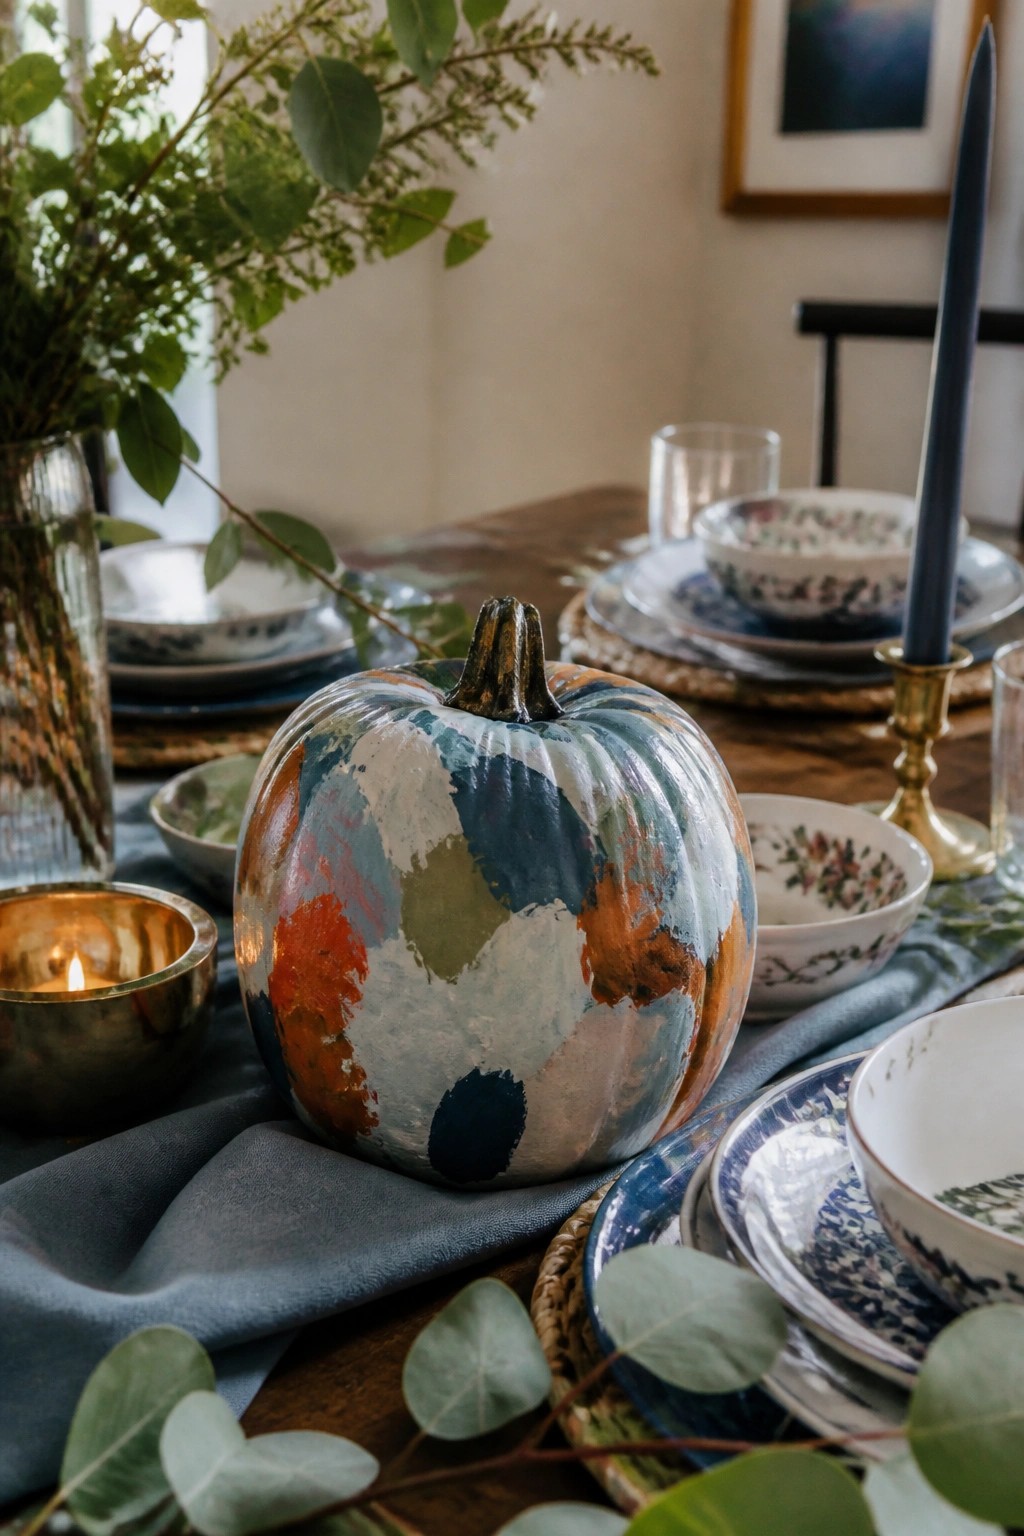
A single pumpkin painted in big patches of teal, orange, and white makes a strong focal point on the dining table. The large size and bright mix of colors keep it from blending into the rest of the setup.
Place the pumpkin right in the middle of the table on a simple runner or cloth. One painted piece like this works best when the rest of the table stays fairly plain so the colors stand out.
Paint An Ocean Sunset On Your Pumpkin
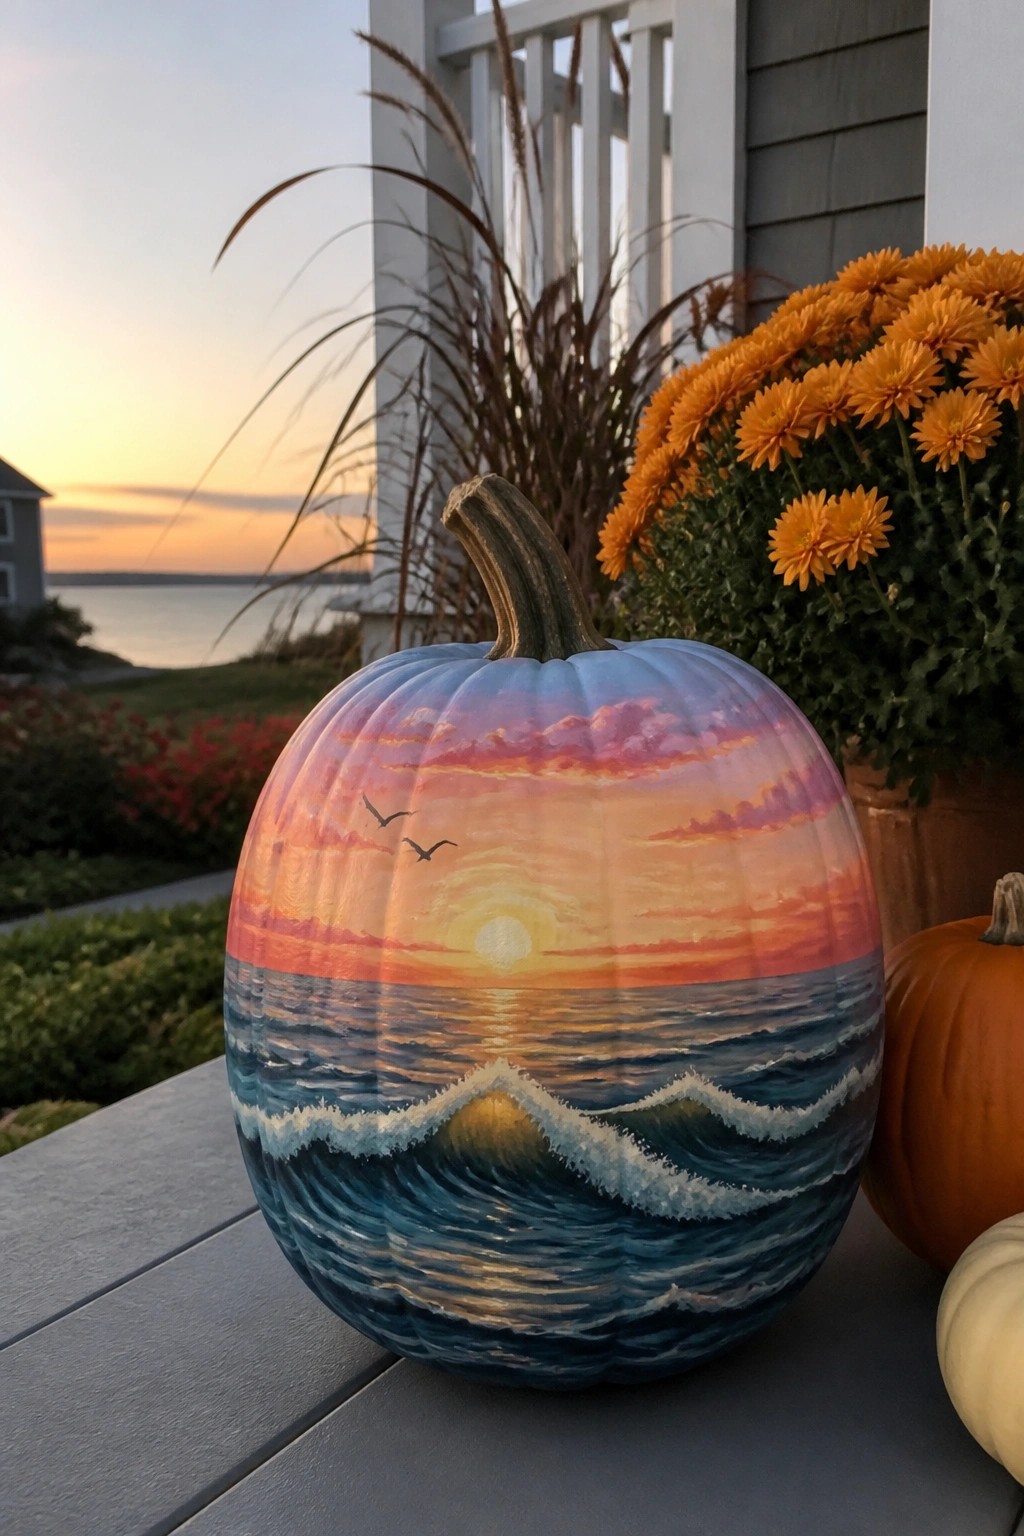
A painted pumpkin stands out more when it carries an entire scene instead of just a carved face. The sunset colors, glowing sun, and rolling waves give this one real presence on a porch or patio table.
Use a large pumpkin so the details read from a distance. Place it where light hits the front, keep surrounding items simple, and let the artwork do the work.
Paint A Pumpkin Black With Gold Accents
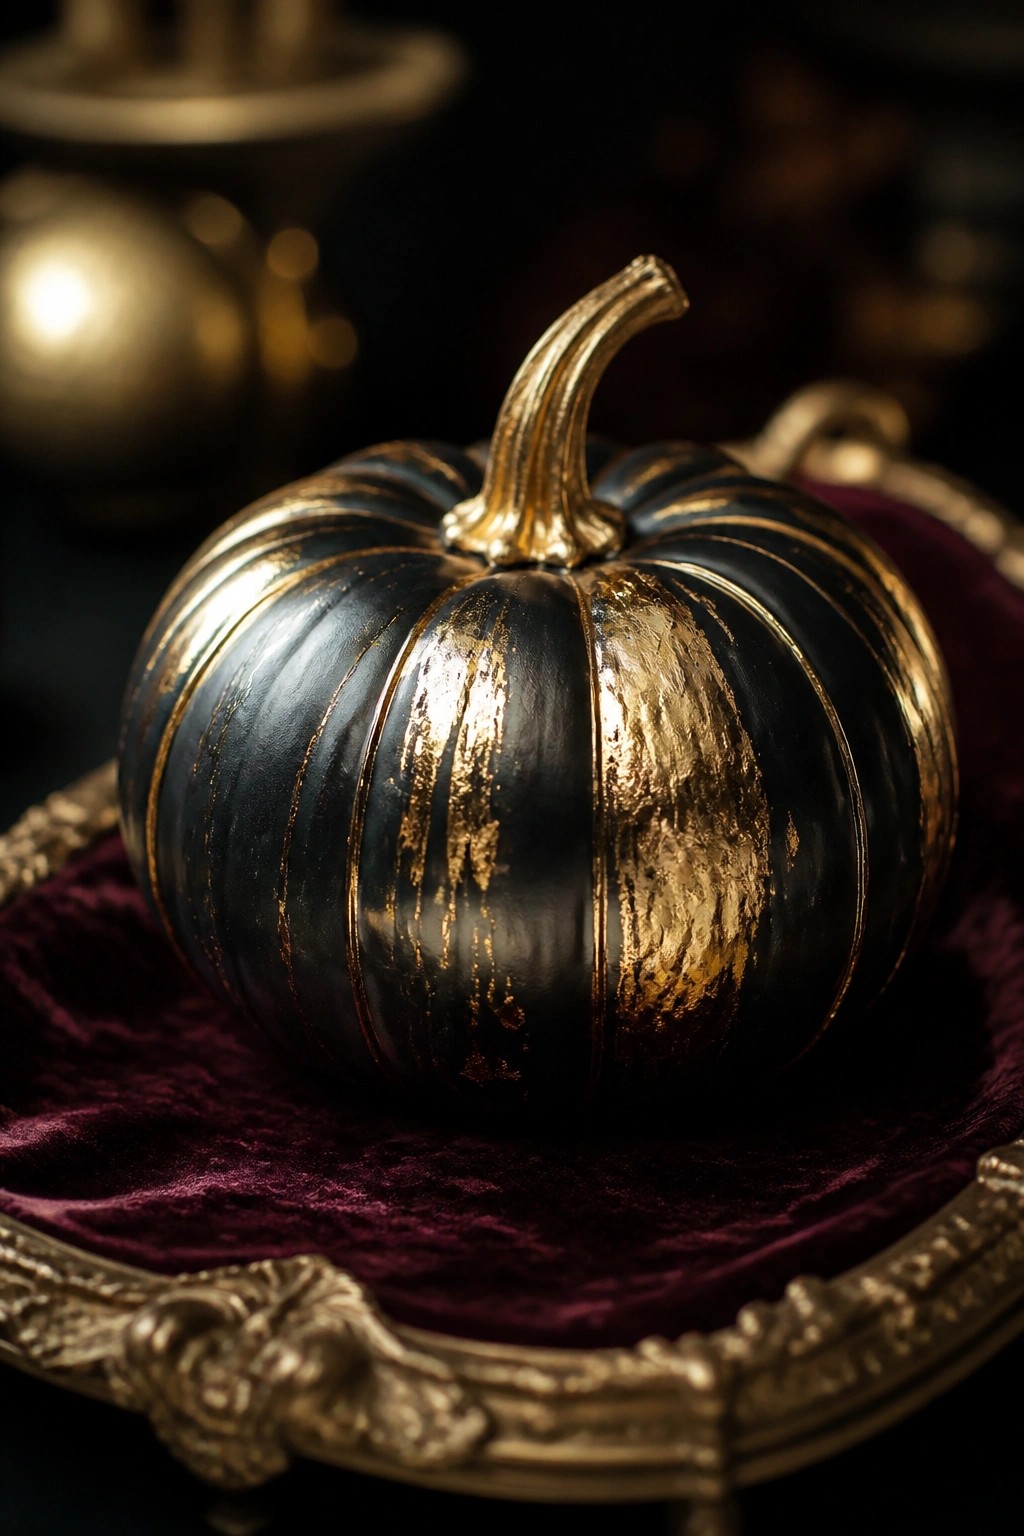
A black pumpkin covered in streaks of gold paint creates a strong visual contrast that feels both modern and festive. The metallic gold catches the light and turns a simple pumpkin into the main focal point instead of just another seasonal accent.
Set the painted pumpkin on a deep red or burgundy fabric inside a decorative tray to keep the look contained and polished. One or two pumpkins treated this way are enough to make the idea read clearly without needing extra props around it.
Group Neutral Painted Pumpkins On Shelves
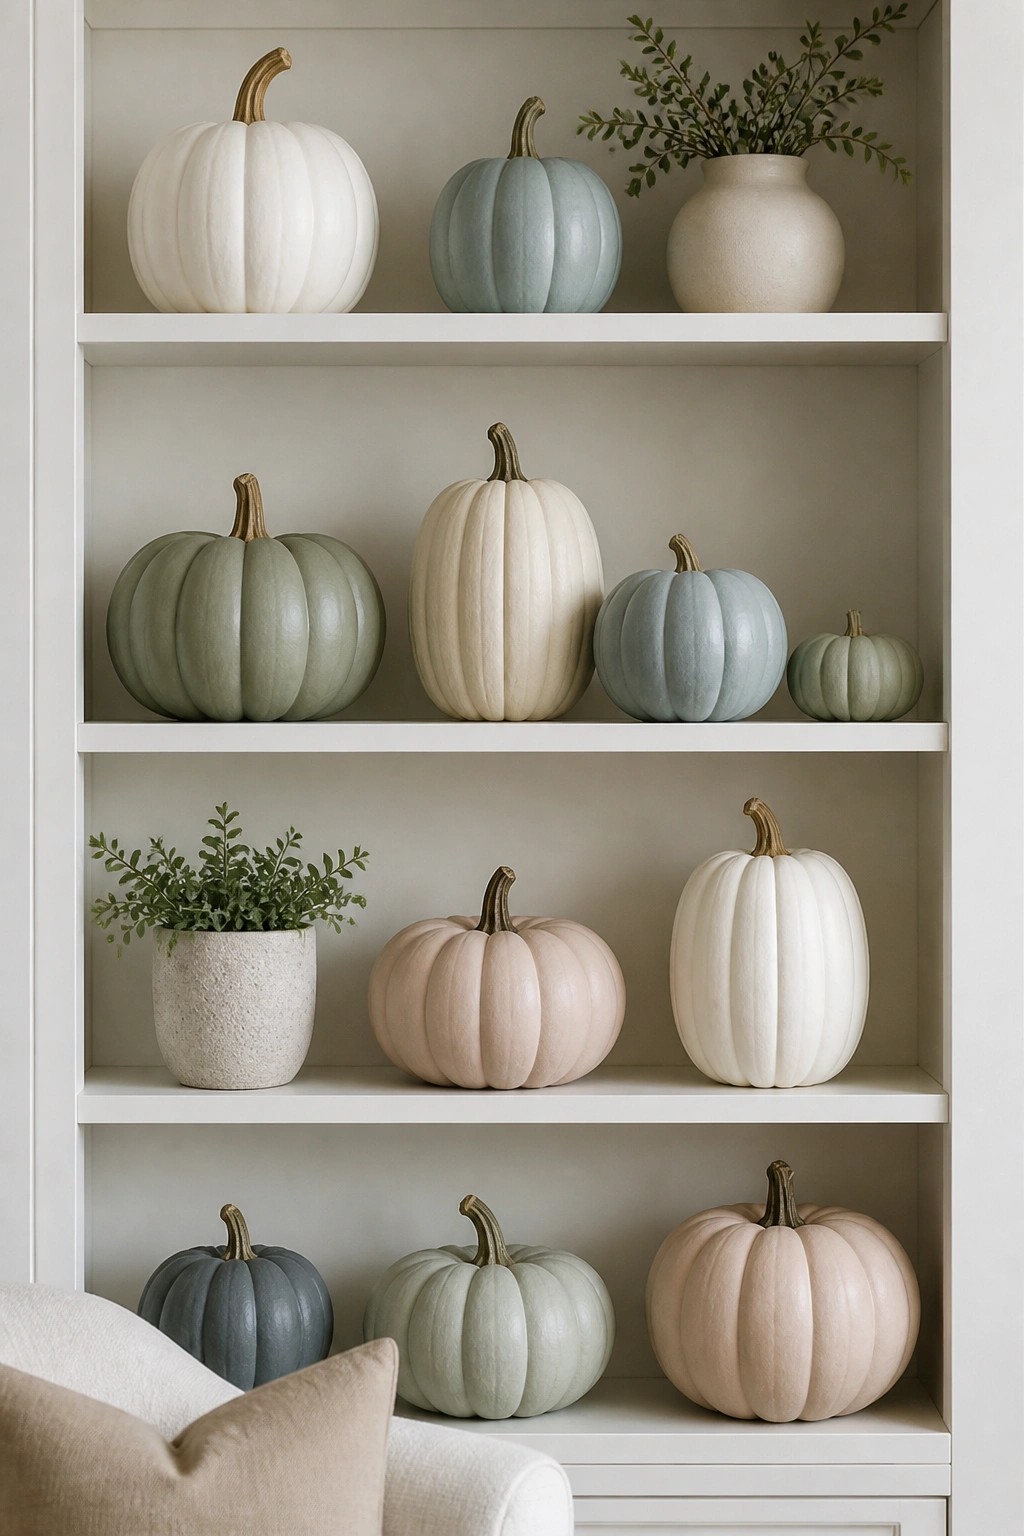
Painting pumpkins in soft neutrals and muted tones turns a simple shelf into a quiet Halloween statement. The range of sizes and the calm color mix keep the display from feeling busy while still making the seasonal theme obvious.
Start with five to eight pumpkins in shades like cream, sage, and dusty blue. Place the largest ones on the bottom shelves and work upward with smaller pieces. A few small plants or branches in between help the arrangement feel balanced without adding clutter.
Group Painted Pumpkins On An Entry Console
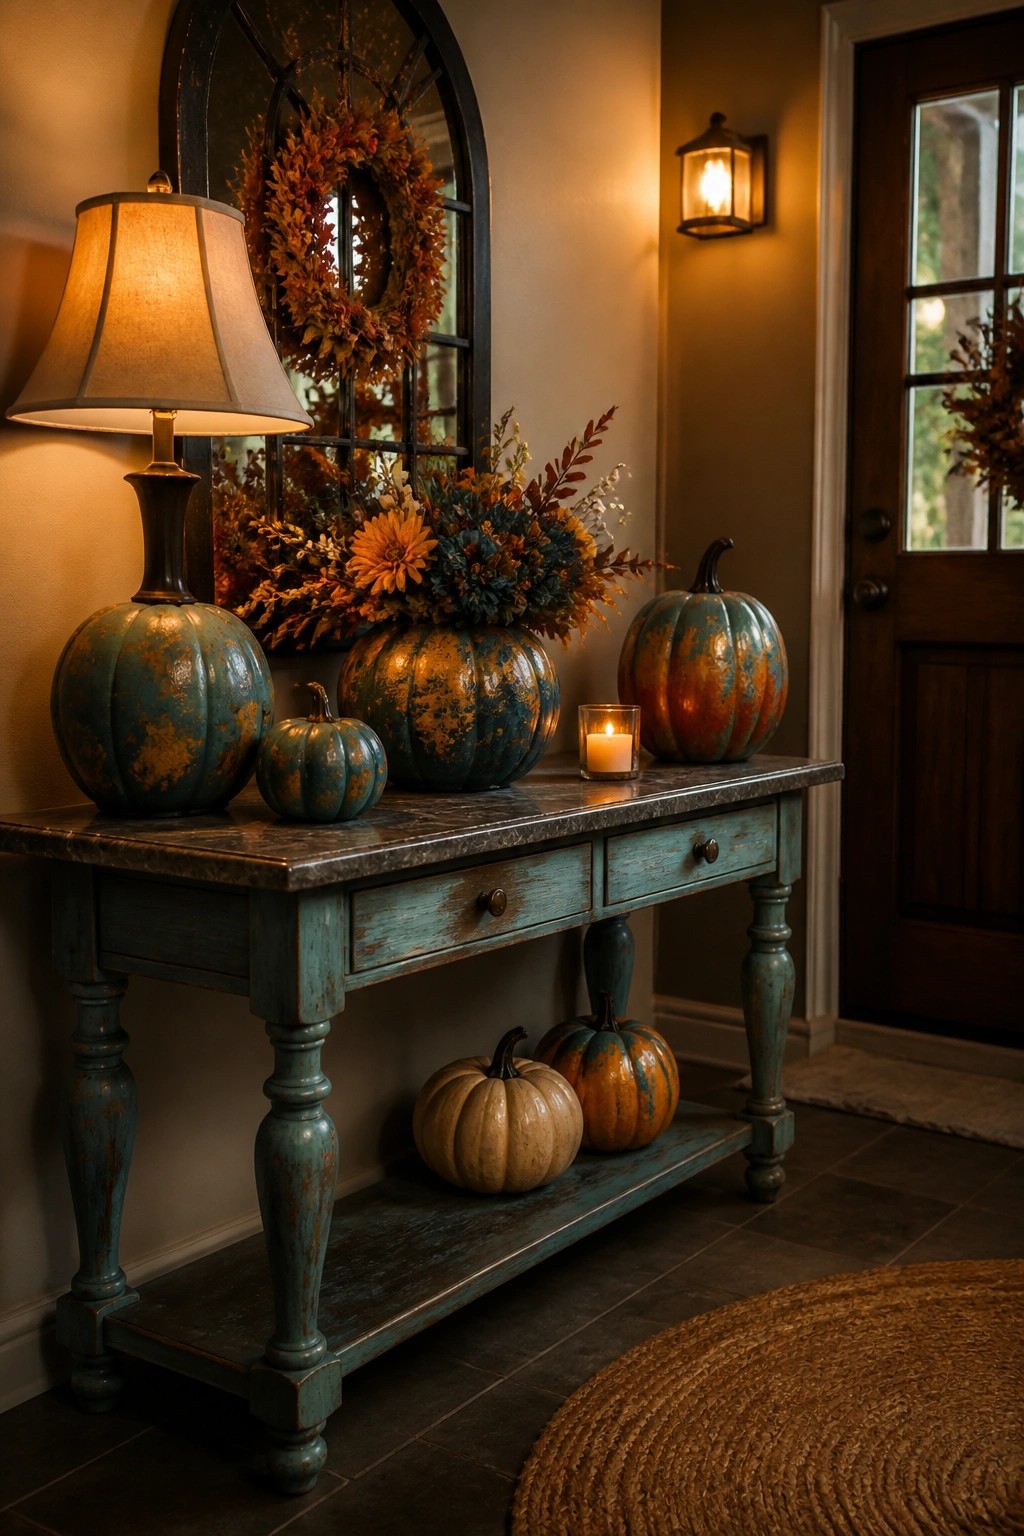
Painted pumpkins stand out best when you group several together instead of scattering them. The mix of sizes and the worn teal and orange finish give the display real presence without needing extra props or clutter. It turns a simple console into the main Halloween feature right by the door.
Try the same look by picking three or four pumpkins, painting them in two or three colors, then sanding the edges for that aged texture. Set the largest ones at the back and smaller ones in front so the whole group reads as one clear statement. This works especially well in an entry where people see it right away.
Paint A Pumpkin With A Bold Split Face
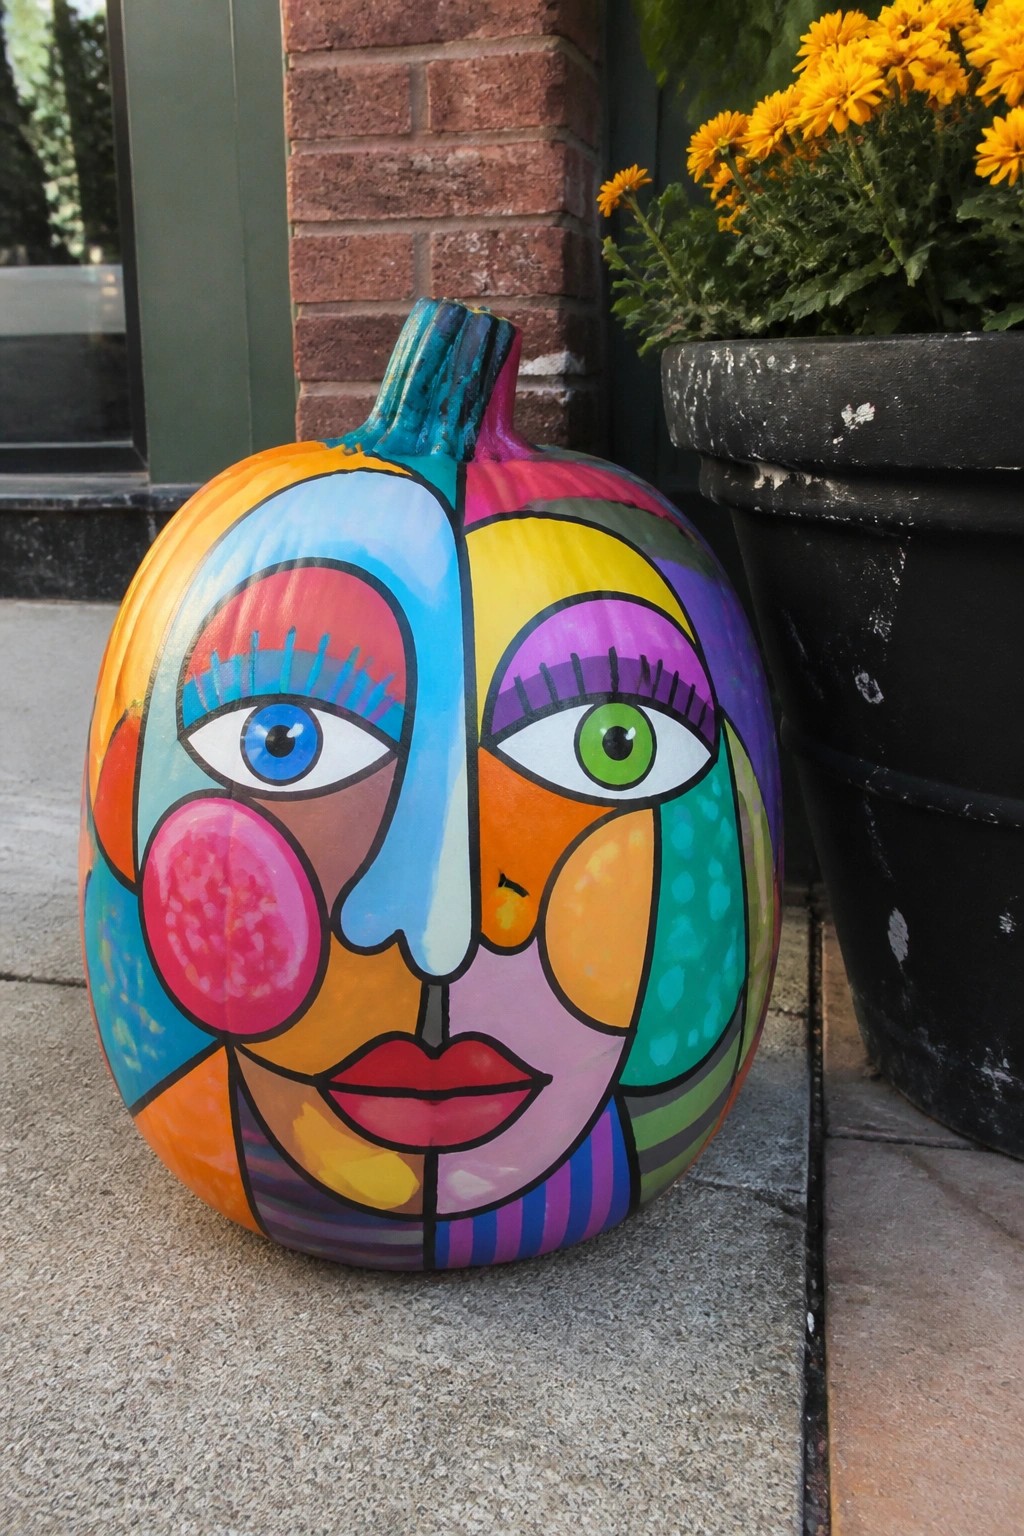
A single large pumpkin with a brightly painted face can carry an entire Halloween display. The split design with mismatched eyes, strong black outlines, and blocks of color makes the pumpkin easy to spot from a distance and keeps the look from feeling ordinary.
Set the pumpkin on the ground near your entry or porch steps so it becomes the first thing guests notice. Use acrylic paints in any colors you like and keep the rest of the area simple so the pumpkin stays the focus.
Group Painted Pumpkins Down The Center Of The Table
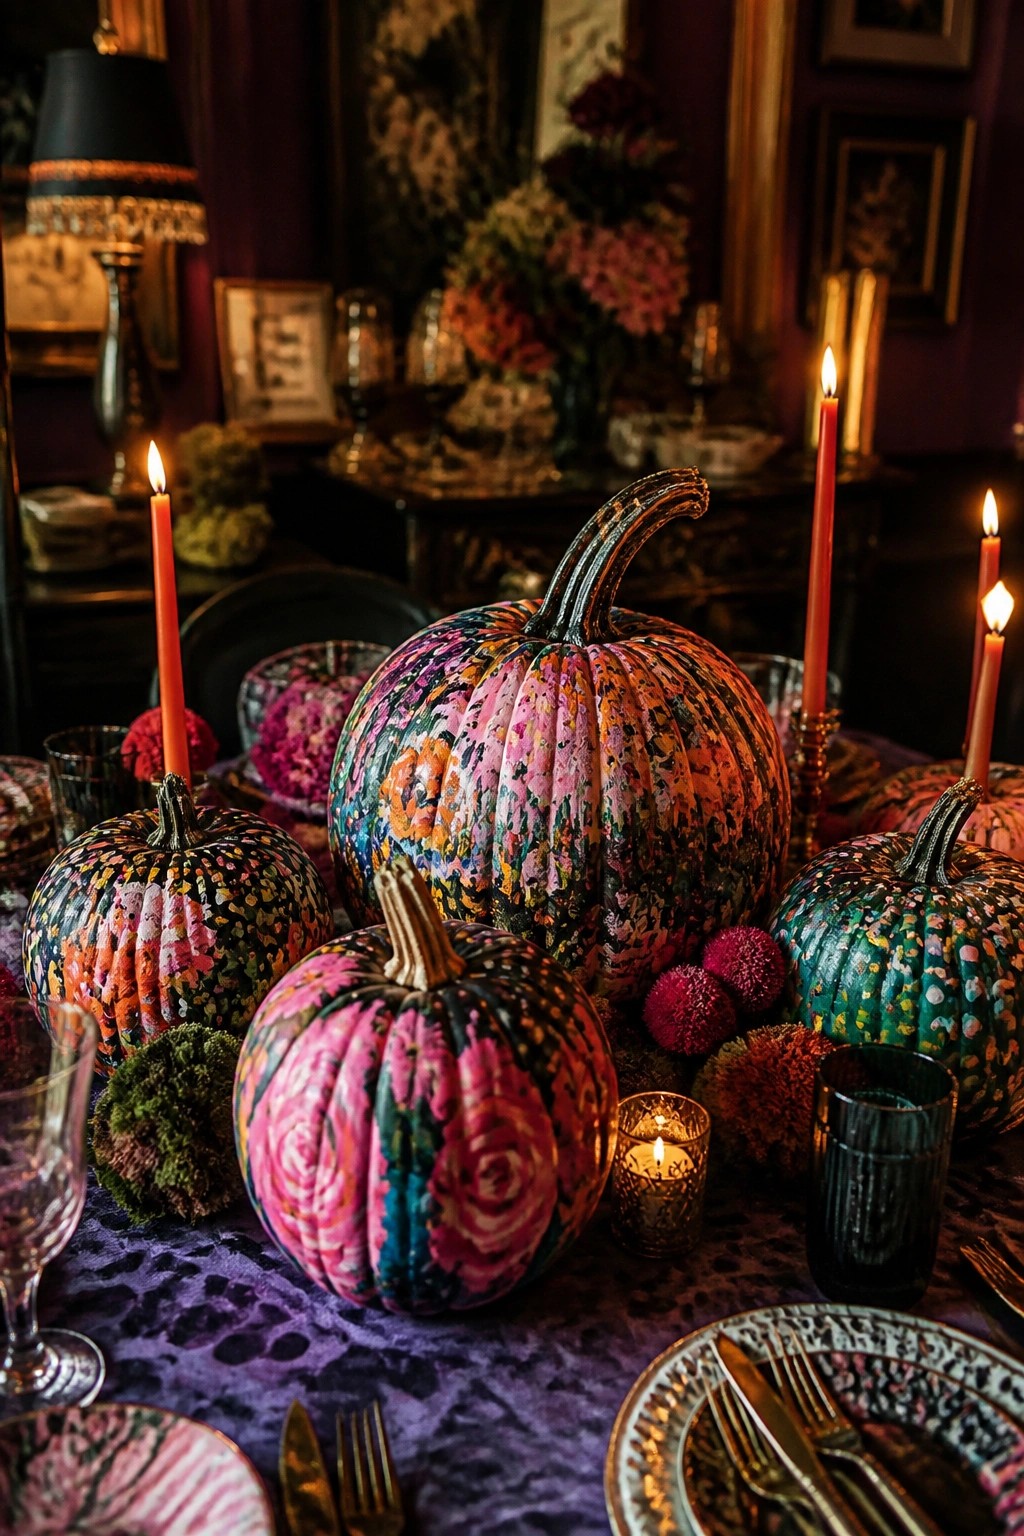
Painting pumpkins in bright, mixed patterns turns them into the main event on a dining table. The bold colors and varied designs stand out against a dark tablecloth and keep the look lively instead of traditional orange. A few lit candles tucked between the pumpkins add a soft glow without competing with the paint.
This works best on a long table where you can spread out five or six pumpkins of different sizes. Choose two or three repeating colors so the arrangement feels coordinated rather than random, and keep the rest of the table setting simple. The painted pumpkins do most of the work.
Create A Storybook Cottage On A Painted Pumpkin
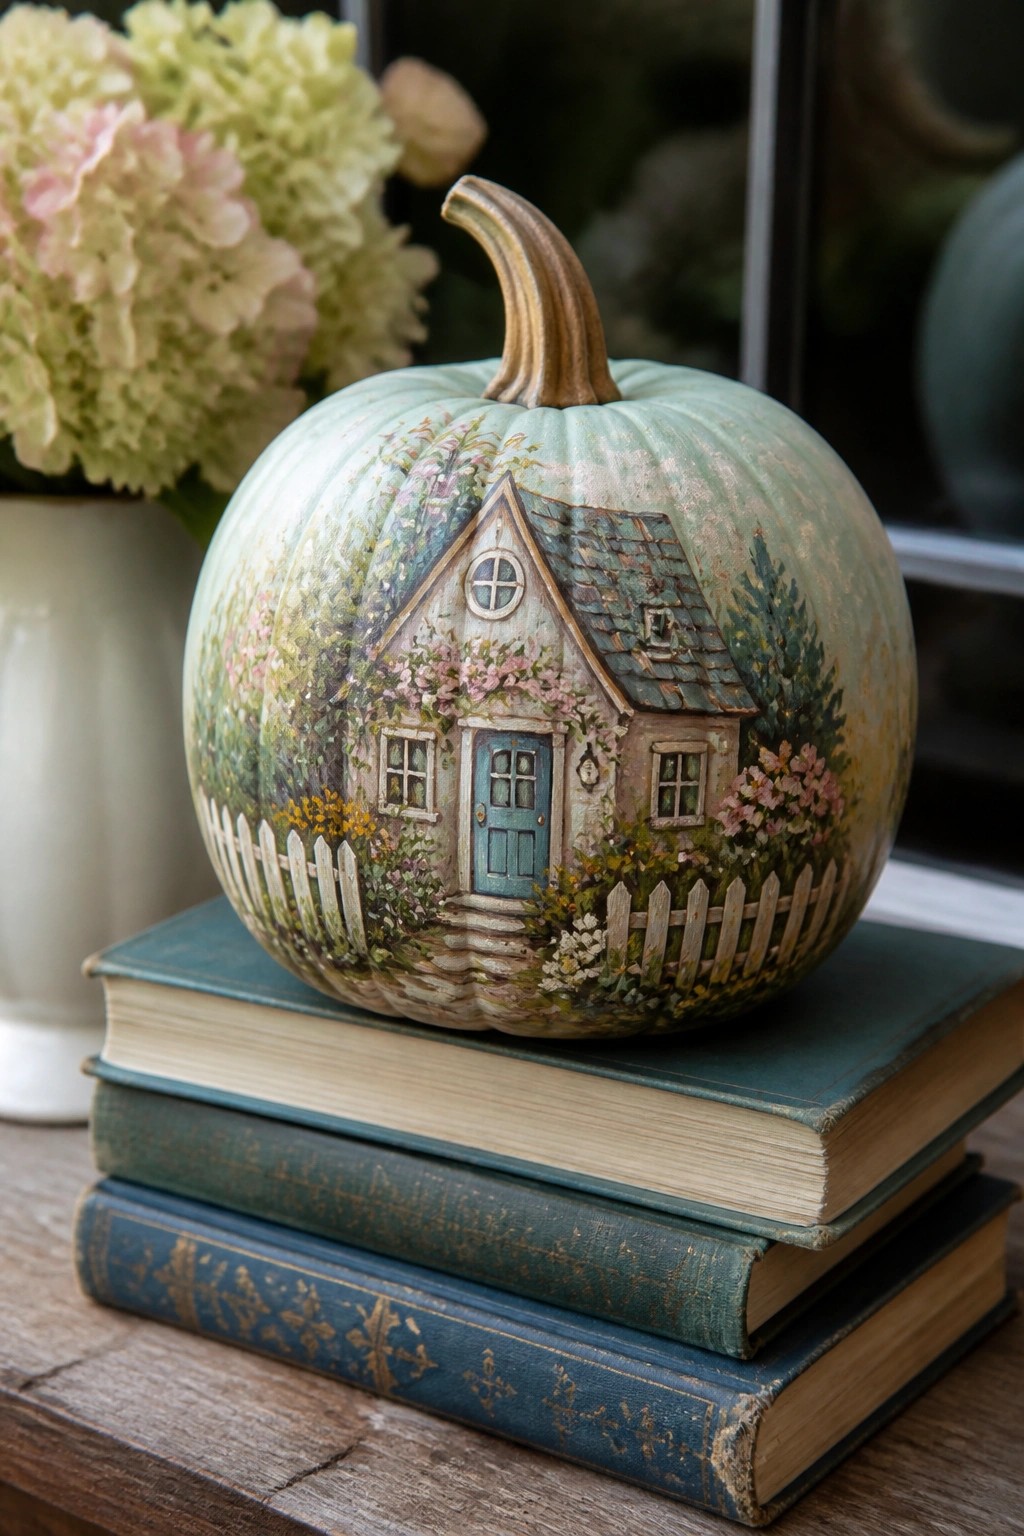
Painting a full house scene onto a pumpkin turns a simple gourd into the main focal point. The detailed cottage with its blue door, windows, and climbing flowers gives the pumpkin a finished, almost illustrated look that stands out on its own.
Set the pumpkin on a stack of books or a low table where the artwork can be seen up close. One or two supporting pieces like flowers nearby are enough to finish the vignette without crowding the painted surface.
Stack Painted Pumpkins For A Tall Display
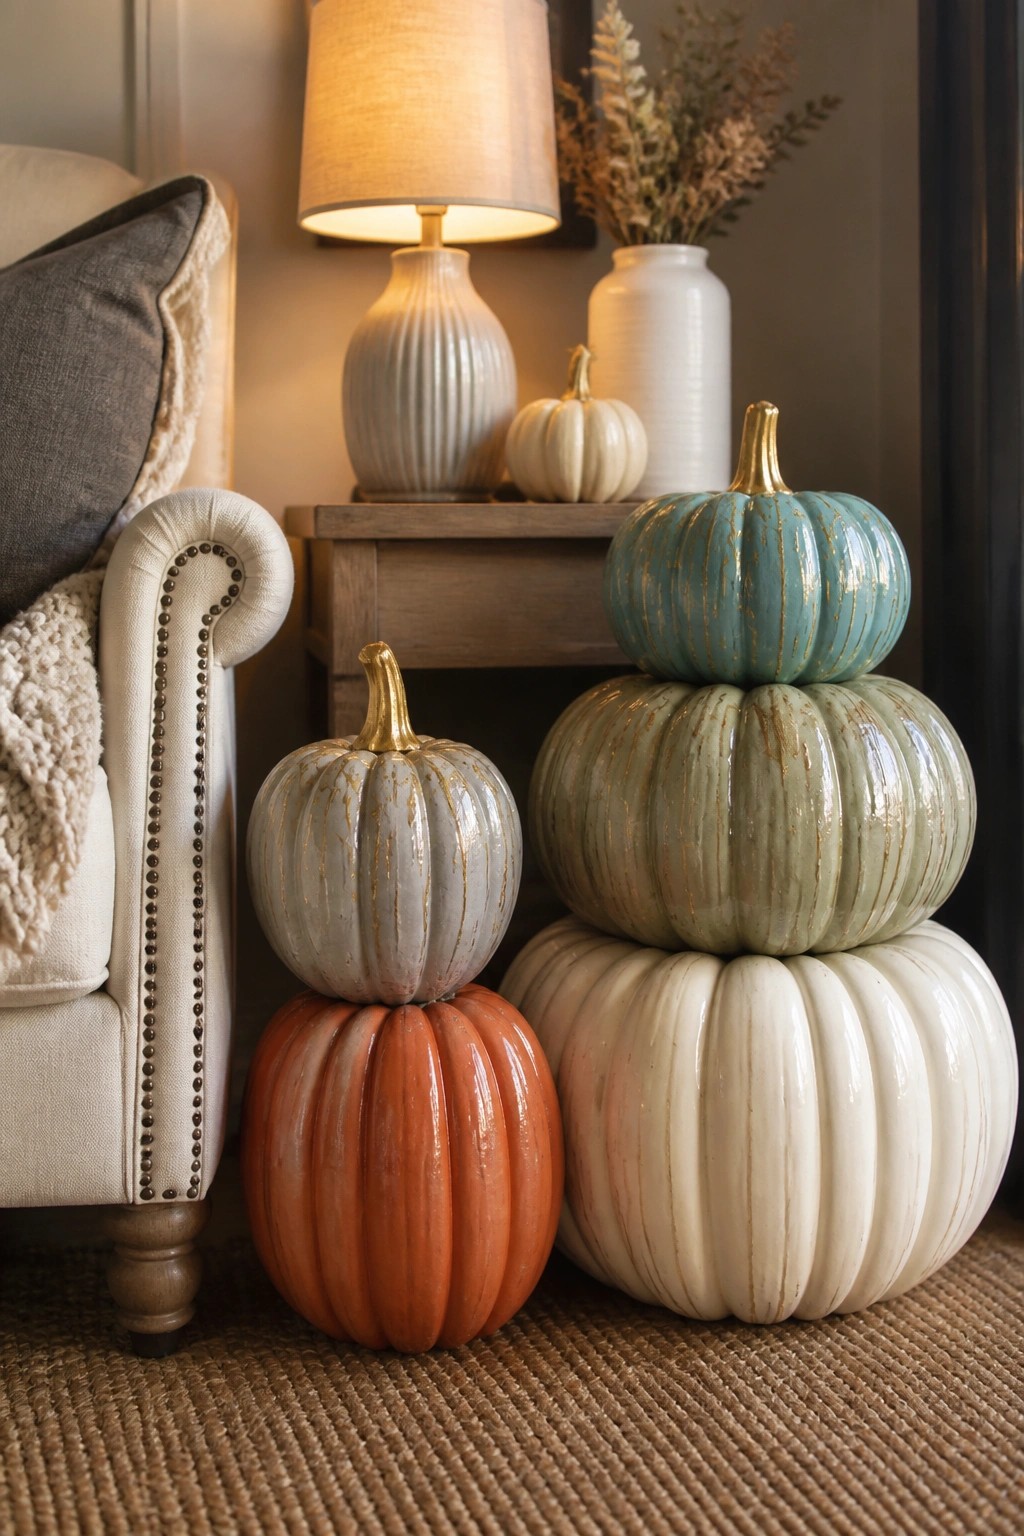
Stacking painted pumpkins in different sizes and colors makes an easy focal point that still feels seasonal. The gold stems and soft distressed finish help the colors stand out while keeping the look calm enough for everyday rooms.
Place the stack on the floor next to a chair or low table so it reads as one piece. Use three to five pumpkins in similar tones and vary the heights to keep the shape interesting without crowding the space.
Paint One Pumpkin As A Storybook House
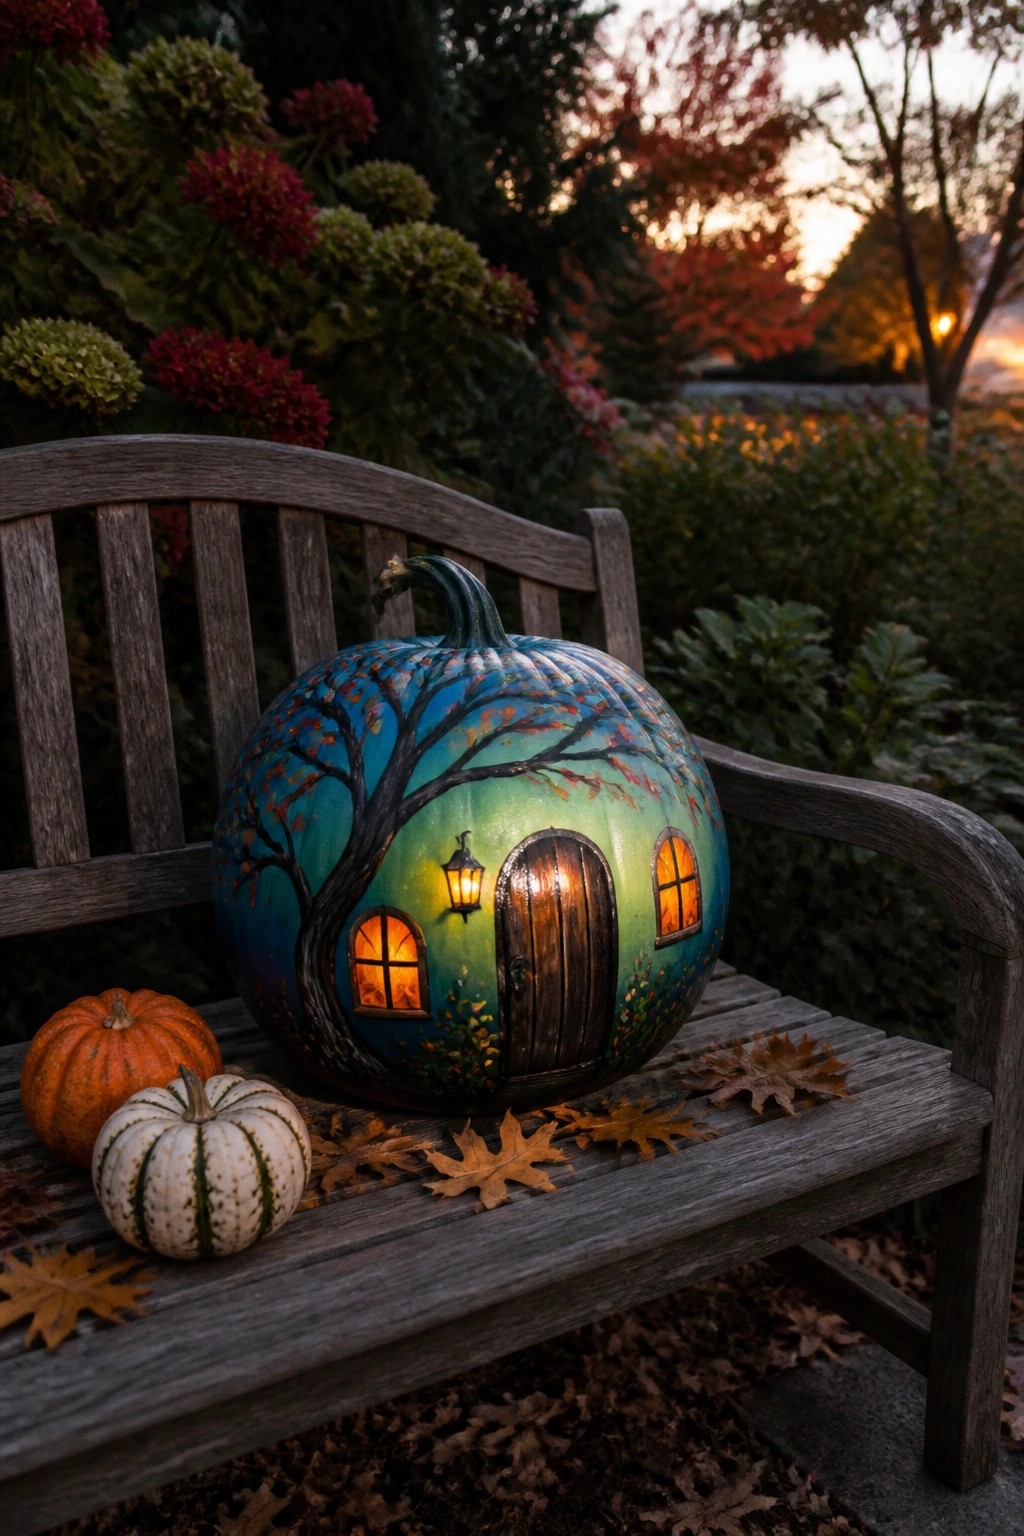
A single large pumpkin can carry the whole idea when you paint it to look like a tiny house. The glowing windows and door give it instant presence, and the tree wrapping around the sides turns an ordinary gourd into something that feels finished and intentional.
Set it on a porch bench or step where the light can show through the painted openings. Sketch the house shape first, block in the main colors, then add a small battery light inside through a discreet cut in the back. Keep the rest of the spot simple so the painted pumpkin stays the focus.
Paint A Bold Pumpkin For The Dining Table
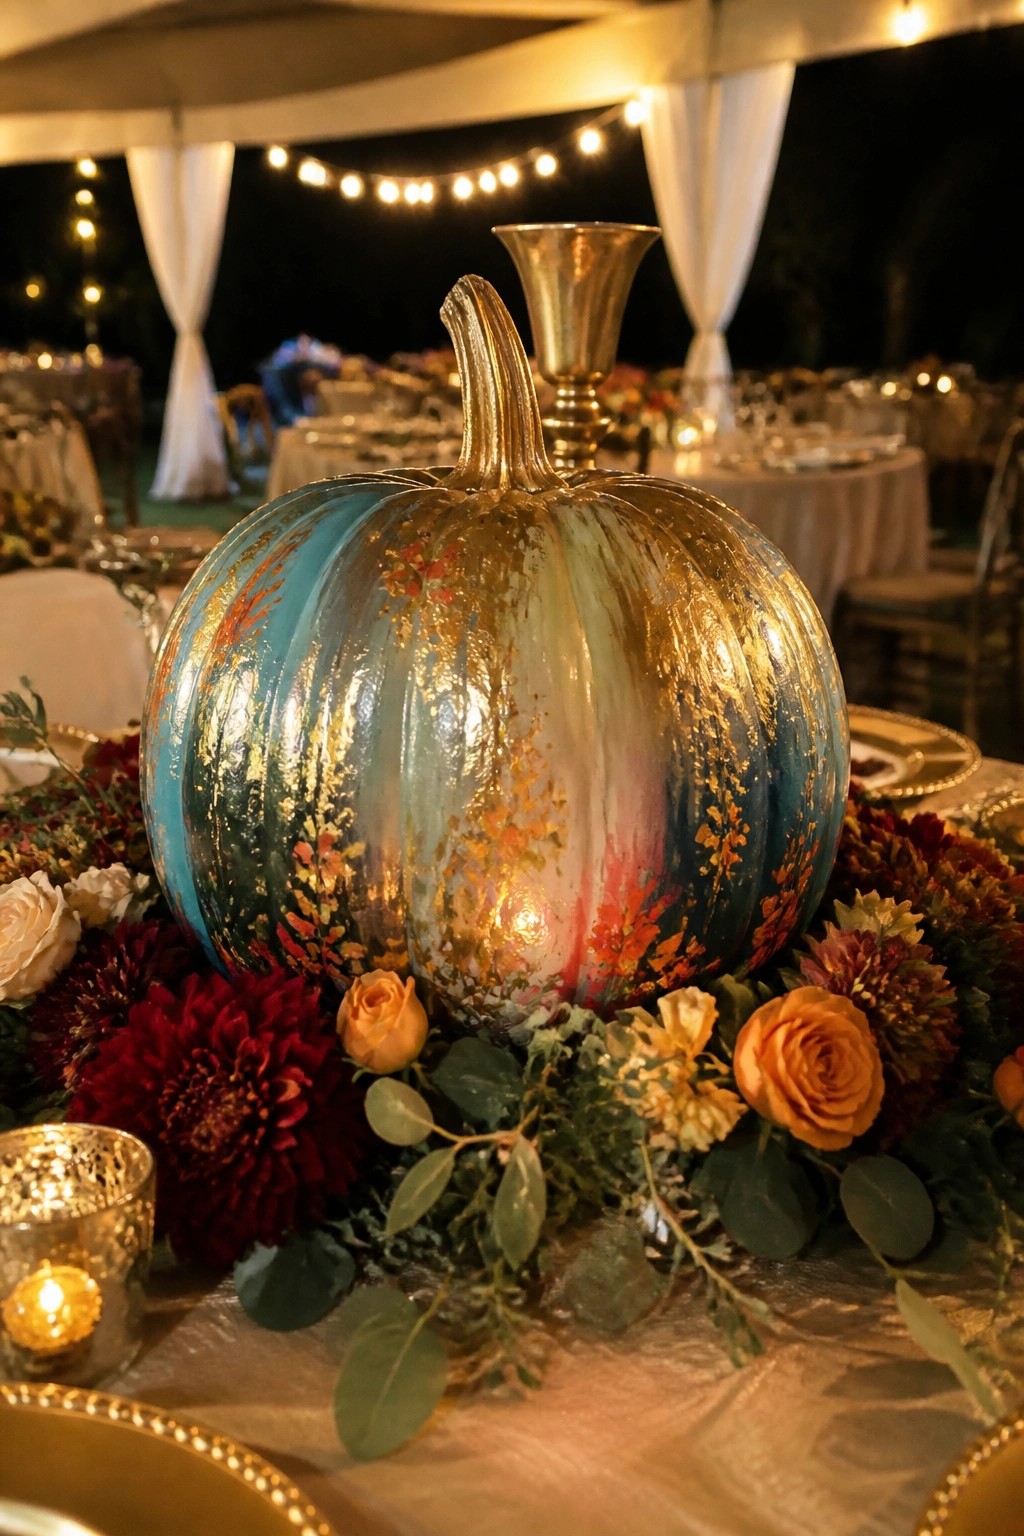
A painted pumpkin makes a strong centerpiece when you want something simple but eye catching. The metallic gold, turquoise, and pink tones on this large pumpkin turn it into the main focus without needing extra props or complicated arrangements.
Place one painted pumpkin in the middle of the table and add a few flowers or greenery around the base to keep it grounded. This works well for both indoor dining rooms and outdoor setups, and you only need one standout piece to make the whole table feel decorated.
Frequently Asked Questions
Q: What kind of paint works best for these colorful designs?
A: Acrylic paints give you those bright pops of color without soaking into the pumpkin skin. Pick up a few basic colors and mix them to match your idea. Seal everything with a clear coat once the paint dries.
Q: How do I keep the paint from chipping after a few days outside?
A: Start with a clean dry surface and apply thin layers instead of one thick one. Let each coat dry fully before adding the next. This approach holds up better in changing weather.
Q: Can I paint pumpkins with my kids without making a huge mess?
A: Lay down some newspaper and use washable paints for easier cleanup. Let the little ones handle simple shapes while you add the details. Everyone ends up with something fun to display.
Q: Should I use real pumpkins or go for fake ones?
A: Real ones look great but start to rot after a week or two. Fake versions let you keep your painted designs around much longer. Choose based on how soon you want to swap them out.


