I usually carve the same basic faces into pumpkins until I remember how quickly they blend into every other porch on the block.
Pushing the design further lets a single jack o’lantern pull real attention without needing extra bats or webs scattered everywhere.
The versions that work best in my house still read as pumpkins first and clever ideas second so they fit with the furniture already there.
Trying new shapes or lighting tricks keeps the whole setup from feeling like ordinary fall decorations.
One strong idea beats ten average ones.
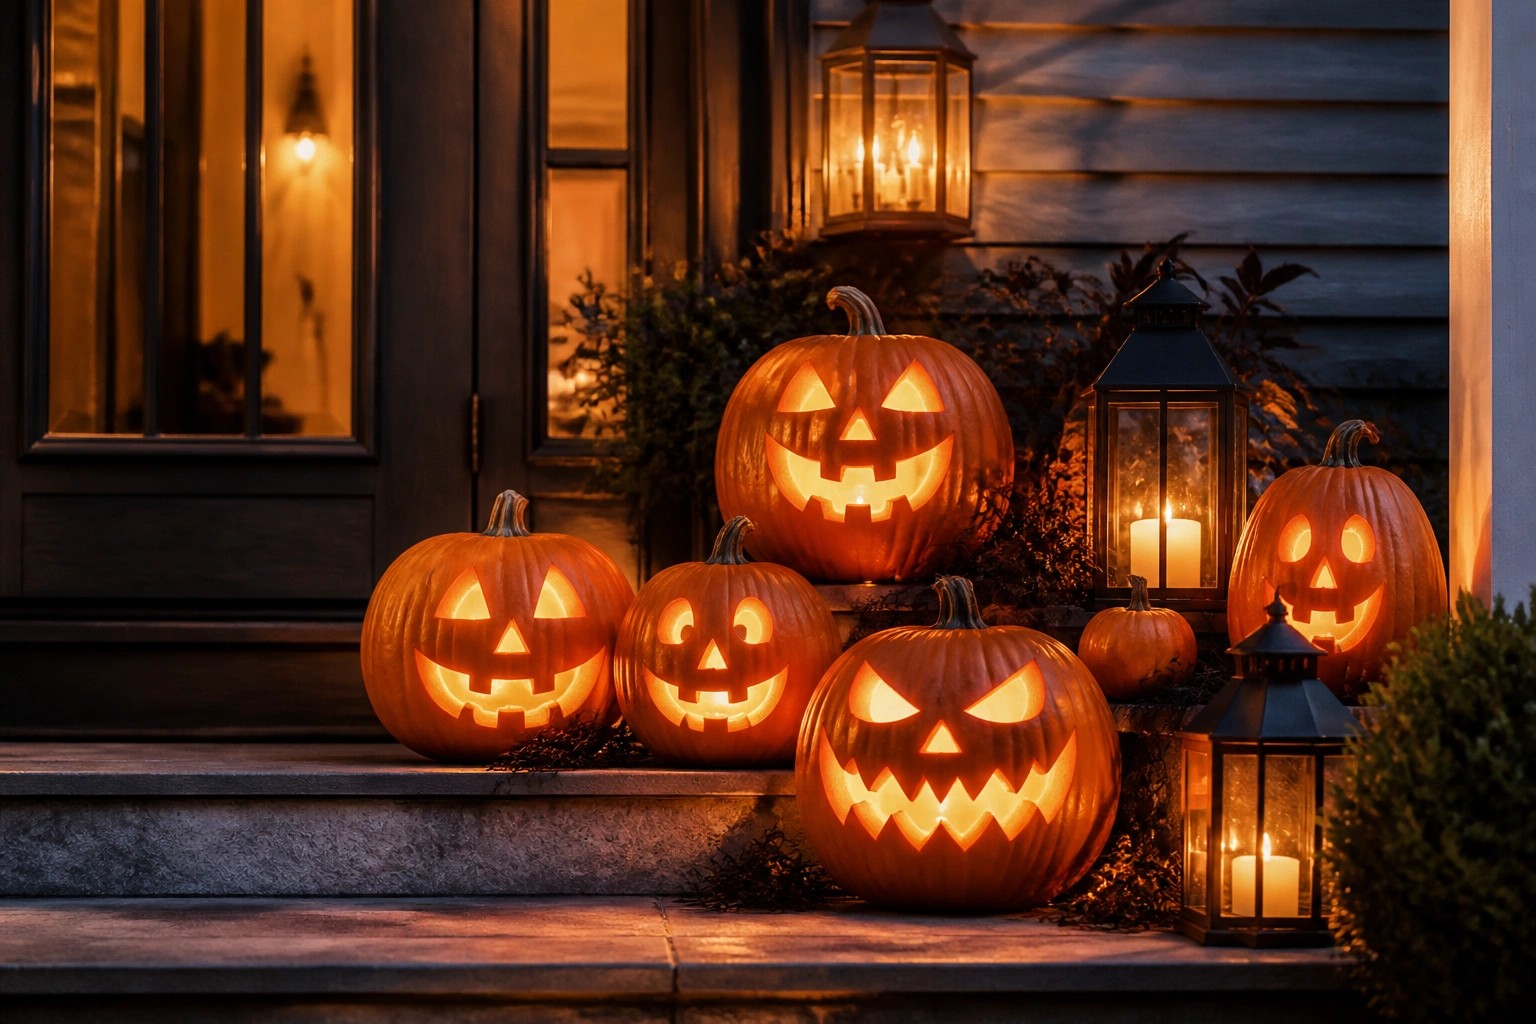
Group Jack O Lanterns On The Porch Steps

Placing several carved pumpkins together on the front steps makes the display feel more complete than spreading them out. Different sizes and face styles give the group personality while the glowing cuts stand out against the stone and plants around them.
Start with a few larger pumpkins at the base and add smaller ones higher up. Keep any extra lanterns simple so the carved faces remain the main focus. This setup works well on porches with wide steps and needs only a handful of pumpkins to look full.
Arrange Jack O Lanterns Across The Mantel

Carving a mix of faces and lining them up on the mantel turns an ordinary fireplace into a strong Halloween focal point. The glowing eyes and mouths stand out against the wood and stone, and the arrangement feels full without needing much else.
Place the largest pumpkins toward the center or one end, then fill in with smaller ones and a few candles. This works best if you keep the rest of the mantel clear so the carved pumpkins stay the main event.
Center A Carved Jack O Lantern On A Neutral Tray

A single carved pumpkin makes a strong focal point when placed in the middle of a tray surrounded by smaller pumpkins and dried flowers. The carved face adds the Halloween element without needing extra spooky props, and the neutral colors around it keep the look clean and balanced.
This setup works well on a coffee table or dining table where you want one clear statement piece. Use one larger carved pumpkin as the center, add a few small pumpkins and a strand of wooden beads around the base, then fill in with dried stems. It stays simple but still reads as intentional Halloween decor.
Use A White Jack O Lantern For A Calm Display

A single white pumpkin with simple carved features can stand out more than a group of orange ones. The pale color keeps the look light and lets the glowing face become the clear focal point without competing with other colors or patterns.
Set one on a console or side table and pair it with just a few bare branches in a plain vase. This works well in an entryway or living area where you want a recognizable Halloween accent that still feels understated. One well-placed pumpkin is usually enough.
Mix Jack O Lantern Faces Across Your Front Steps

Placing several jack o’ lanterns with different carved faces along the steps creates a strong focal point without needing much else. The variety in expressions, from wide grins to surprised looks, makes the display feel more interesting than a row of identical pumpkins.
This approach works well on any set of porch steps or entry stairs. Use three to six pumpkins in different sizes, carve a few different faces, and light them from within so the contrast shows up after dark. Keep the rest of the area simple so the pumpkins stay the main feature.
Mix Different Carving Styles In One Pumpkin Cluster

A group of jack o lanterns carved with mismatched patterns stands out more than a row of identical faces. Stars, stripes, flowers, and simple dots all cut into the same display create variety that feels intentional rather than random.
Set the pumpkins down the middle of a dining table on a basic runner and light them from inside. Keep any extra candles small and low so they do not compete with the carved details. The mix works best when the rest of the table stays fairly plain.
Cluster Jack O Lanterns Across The Mantel

Placing several carved pumpkins together on a mantel creates a strong focal point without needing much else. The glowing faces stand out against the dark surround and draw attention right to the center of the room. Different sizes and expressions keep the display interesting instead of flat.
Use three to five pumpkins in a row or slightly staggered, and add a few pillar candles or a simple garland underneath for support. This works well in living rooms or entry spaces where the mantel is already a natural eye catcher. Keep the rest of the surface clear so the carved pumpkins remain the main feature.
Line A Walkway With Rows Of Jack O Lanterns

Placing carved pumpkins along both sides of a path turns an ordinary walkway into the main Halloween feature. The glowing faces create a clear line that draws people forward and makes the whole setup feel intentional rather than scattered.
This idea works best on a front path, garden trail, or side yard where you can repeat the same size pumpkins for a steady look. Use battery candles inside each one so the light stays consistent, and keep the spacing fairly even so the effect reads as a single display instead of random pumpkins on the ground.
Carve A Pumpkin Into A Tiny Cottage

This approach skips the usual face carving and turns one pumpkin into a small house instead. Cutting an arched door, simple windows, and adding a few steps makes the whole thing read as a little home rather than just another jack o lantern. The light coming from inside gives it a warm glow that stands out even in daylight.
Set the finished pumpkin on a windowsill or tabletop where it can be seen from both sides. Add a bit of moss around the base and keep any extra pumpkins small so the cottage stays the main focus. It works with just one large pumpkin and a few household items for the steps and trim.
Carve A Detailed Portrait Into One Pumpkin

A single large pumpkin carved with a realistic woman’s face and flowing hair makes a striking jack o lantern that feels more like art than a typical Halloween decoration. The light inside highlights the features and gives the carving depth without needing extra pieces or props around it.
Set the pumpkin on a simple wooden board and add a few leaves at the base to keep attention on the carving. This works best on a kitchen counter or island where guests can see the details up close. One well carved pumpkin is enough to carry the idea.
Stack Jack O Lanterns On Wooden Crates

Placing carved pumpkins on wooden crates turns a simple porch into a strong jack o lantern display. The crates add height and structure so the faces show clearly instead of sitting flat on the ground. A mix of sizes keeps the arrangement interesting without needing extra props.
This idea works well near an entry because it stays contained and easy to set up. Use two or three crates, stack them unevenly, and place the largest pumpkins on top while tucking smaller ones lower down. The crates can stay outside through the season and store flat afterward.
Group Jack O Lanterns Across The Mantel

Placing several carved pumpkins together on a mantel gives the display real presence and turns a standard fireplace into the main Halloween feature. The mix of sizes and different face styles keeps it interesting while the lit interiors make the whole arrangement stand out once the lights go down.
Use five to eight pumpkins in a loose row, letting a couple sit slightly forward or back for depth. Add a few pillar candles in between for extra light and keep any other decor minimal so the carved faces remain the clear focus. This works especially well in living rooms or family rooms where the mantel is already a natural gathering spot.
Group Jack O Lanterns On An Entry Console

Placing several carved pumpkins together on a console table creates a strong Halloween focal point without needing much else. The mix of carving styles, from a simple face to one covered in small holes, keeps the display interesting while still feeling cohesive.
This setup works well in an entryway because it greets guests right away and stays contained to one surface. Use three to five pumpkins of different sizes, add a single candle for light, and keep surrounding items minimal so the carved faces stay the main attraction.
Create A Jack O Lantern Train

Carving several pumpkins into connected train cars gives you a fresh take on the usual jack o lantern grouping. The carved windows and faces let light shine through while the small wooden wheels underneath turn the whole setup into one clear display piece.
Place the train on a low table or sideboard where it can sit as the main focal point. You only need three or four pumpkins, a few battery candles, and something simple like wooden discs for wheels to pull the look together.
Group Jack O Lanterns Along An Entry Console

Placing a mix of carved jack o lanterns on a console table gives the entry a clear Halloween focus without needing much else. The different sizes and a couple of darker finishes help the faces stand out while the warm glow from inside each one draws attention as soon as you walk in.
This setup works well in a hallway or entry because the table already exists as a landing spot. Use five to seven pumpkins in varying heights, add one or two simple dark vases between them if you want, and leave the rest of the surface clear so the carved faces remain the main point.
Cluster Jack O Lanterns With Varied Designs

Placing several jack o lanterns side by side on a table lets you show off different carving styles at once. One pumpkin might have a classic grinning face, another bats, and a third simple cutouts like stars or circles. The mix keeps the display interesting without needing extra props.
Set this up on a porch table or deck where the lights inside the pumpkins can glow after dark. Use five or six pumpkins of different sizes so the grouping feels full but not crowded. Battery candles work well if you want to leave them lit for hours.
Frequently Asked Questions
Q: How do I keep these carved pumpkins from caving in after a day or two? A: Choose pumpkins with thick sturdy walls and scrape the inside thin but even. Mist the cuts lightly with water each evening to slow drying.
Q: Can I try these looks without buying special carving kits? A: Grab whatever kitchen tools you already own like a paring knife or melon baller. Test your pattern on a scrap piece of rind first so the cuts stay clean.
Q: What if I want to light one of the more open designs? A: Tuck in a few glow sticks or a small LED puck instead of a flame. Skip the power tools since they crack the shell too easy.


